God for us to design products, we are the porters of nature!


Oxalic Acid
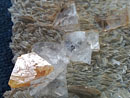
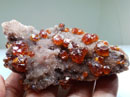
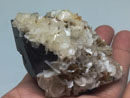
Anything that has the word "acid" sounds ominous. But oxalic acid is easy to find, use and the safest for the home. In fact it is found in many vegetables including spinach. It is used to dissolve the iron oxide (brown) stain on all minerals. Specimens collected at Phoenixville, Ellenville, Case Quarry, NH smoky quartz and many others clean up beautifully with oxalic acid. Zeolites do not respond as well, so you should test beforehand on small specimens to see how they react.
To make this as simple as possible I will give a step by step guide to its use. Do not take any shortcuts or make substitutions. Purchase a one pound box of Oxalic Acid (OA) powder at your local hardware store in the paint department or at a paint store. It is used as wood bleach and will be labeled as such. The most common brand is Rainbow.
Fill a plastic one gallon container 3/4 full with hot tap water. Pour in the OA crystals and stir for five minutes. Be careful not to inhale any powder when adding the crystals. Once the OA is dissolved top off the container to a full gallon. Label the container and put out of reach of children or pets.
When you are ready to use it place your specimens in a plastic container and add enough OA solution to cover. Set aside for several days.
After the iron color has disappeared then you can remove the specimens (with gloves on) and wash under running water for three hours. Then soak in clean water for a day changing the water as often as possible.
Heat speed up the reaction, as does agitation. If you have a hot plate and can set up outdoors or in an area with good ventilation the repeat step 4 but heat the solution to bath water hot (110o f.). Never Boil! You will find that an hour in hot solution will usually do the trick. Best of all is an ultrasonic cleaner with built in heater. Sometimes only 30 minutes is necessary. But you should not put the OA directly into the stainless steel basin. Make a double boiler type of arrangement by partially filling the ultrasonic cleaner basin with water. Then place your specimens and OA solution in a plastic container or heavy duty plastic bag that is suspended in the water.
You can reuse the solution over and over. As it dissolves more and more iron it will get darker often taking on a green color. After it gets really dark I would discard it and mix a new batch. Safety is important. OA solution is highly toxic. It can absorbed through the skin and builds up in your organs cumulatively. Same goes for the fumes, which is why you never boil the solution and always have proper ventilation when using the heated solution. Be careful not to spill the solution on porcelain and keep away from food preparation surfaces.
In spite of the fuss, this is the best all around method of cleaning minerals. I keep a large five gallon bucket with tight fitting lid filled and ready, I drop specimens in as I collect them. It always works and the large volume does not exhaust quickly. Mastering this technique will provide an important tool in your mineral cleaning and preparation arsenal.
Muriatic Acid
Now we are going to get more aggressive with our mineral cleaning technique. Hydrochloric Acid is available in most hardware store as Muriatic Acid. It is sold in one gallon containers and is used to clean masonry and as a rust remover, which is what we will use it for. In spite of its availability, it is dangerous. Do not inhale the fumes or get any on your skin or in your eyes. Always wear gloves and eye protection and old clothes. Keep your arms covered even if it is a hot day. And always observe the safety precautions on the container.
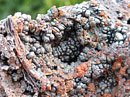
There are two main uses for hydrochloric acid: removing carbonates like calcite that often are the last minerals to form in a pocket and therefore obscure other mineral crystals, and the more aggressive removal of iron oxide rust stains (faster than Oxalic Acid). The former use is the most common and often produces staggeringly beautiful specimens because the calcite being dissolved protected the minerals underneath. Specimens of almandine from the Trumbull, Ct., or vesuvianite from the Goodall Q. in Sanford, Maine are all easily cleaned in hydrochloriic acid. If hydrochloric is being used to remove iron oxides you should be careful that there are no carbonates in the specimen that you want to keep. The acid will dissolve them. Which is why, no matter what minerals you are cleaning, always test your cleaning agents on lesser pieces to make sure you will not ruin your best pieces. The basic procedure is:
First wash your minerals carefully in water to remove any loose sand and dirt and to make the acid last as long as possible (sand and dirt contain iron oxide and will exhaust your acid quickly).. Place your minerals in a large plastic container with a lid that can be tightly sealed. Again I prefer a five gallon joint compound bucket found at construction sites. Let your specimens dry and move the container outdoors to an area with good ventilation. Pour in enough acid to cover the specimens. Always wear heavy rubber gloves and be very careful not to splash any acid on yourself.
Depending on what you are removing with the acid you will want to leave it in from 5 minutes to 5 days. If you are etching carbonates/calcite off a specimen then you should check it after five minutes. Be careful not to inhale any fumes when checking the progress. When removing calcite or marble from specimens the action is very fast and active. Your bucket should be large enough to prevent the bubbling foam from overflowing.
If you are removing rust stains from quartz the action can take up to a day and is less energetic. When removing the "sphalerite" crust on quartz crystals from the Spring Glen Mine in Ellenville it is not uncommon to repeat three day sessions removing any loose material between each session. You can place the lid on the bucket to prevent children and animals from exposure (but provide a small vent hole for relieving gas pressure).
According to Jerry Call, a commercial mine owner in Brazil and North Carolina, you should not leave the bucket in the light. He says this results in a yellow stain. Whether light is the source of the stain I cannot tell, but it is not uncommon for some residual acid/rust stain to remain after your first treatment. Then you need a second treatment in fresh, clean acid reserved for such a purpose. You will see the stain disappear quite quickly and you can remove your specimens for neutralizing and washing This final batch can be diluted 1:1 with water. When diluting always add acid to water, NOT WATER TO ACID..
People neutralize the acid many different ways. I prefer to dissolve ordinary household baking soda in a bucket of warm water the immerse your specimens in it (after a brief pre-rinse). Let them sit in the baking soda solution for 15 minutes, then proceed with washing.
Because the acid has penetrated the specimen it is best to wash very thoroughly. I prefer the rule of thumb of washing three times the time the duration the specimen was in acid. If you just briefly dipped it for 5 minutes to remove some calcite then a 15 minute wash will be adequate. But If you left in your quartz specimens in for removing rust stains for a full day, then you should wash them for at least three days. The washing is essentially placing them in clean water and keeping the water clean as the acid diffuses out of the specimens. It is best if you can set a water supply on a slow trickle into the bucket to constantly provide clean water. Otherwise changing the water as often as possible will work. If you are washing for a full day then a water change schedule like this would be appropriate: change water every 15 minutes for an hour; then every hour for four hours; then every four hours for the rest of the day.
As the acid is used up it will eventually turn yellow/green/brown. It can be used until it no longer is effective or until it starts to stain your specimens. If you are using it to dissolve carbonates/calcite the acid will exhaust itself long before the color changes. You will see that it no longer actively dissolves the calcite. It should then be discarded. You can fully neutralize your old acid with crushed limestone or marble or with more baking soda. When it no longer fizzes then you can dispose of the acid safely. The limestone gravel found at the Limecrest Quarry in New Jersey is great for neutralizing the acid.
A last warning, if you are removing calcite from a specimen, do not dissolve all calcite. Often it may be the only thing holding the specimen together. A little calcite can provide a nice contrast and make it more aesthetic. In the case of the spinel crystals from the Limecrest Quarry, there are often alternating layers of spinel and calcite. They will crumble to powder if cleaned too long in hydrochloric acid. Also fluorescent willemite may turn powdery on the surface if cleaned in acid resulting in the loss of fluorescence.
Mechanical Methods
This month we are reviewing mechanical methods of cleaning and preparing mineral specimens. By mechanical we mean using force of some sort to remove unwanted minerals or encrustations. Obviously this method has the potential or damaging the specimen by scratching or fracturing the crystals. As usual, care should be taken to test the methods on lesser specimens to see if there is any damage resulting from the process.
The mechanical cleaning of minerals ranges from a toothbrush to dental picks to ultrasonic cleaners to water guns to sand blasting. I am not going to discuss the more ordinary use of chisels and saws to trim a specimen.
Brass brush and Dental Picks
The first thing we do after a field trip is to wash the specimens and pray that they will cleanup like the minerals sold by dealers. And they never do. Dirt and pocket mud are often very tenacious and require more than running water. The first mechanical tool to try is a brass brush. They are available in hardware stores for use as a cleaning tool and for wood refinishers. Make sure you get brass bristles because brass is softer. Brass is between 3.5 and 5 on Moh's scale of hardness. In theory, you can scrub a specimen of any mineral harder than 5 and not damage the specimen. In reality though, you should always perform a test to make sure. I have used brass brushes on quartz successfully for many years without any damage. Occasionally on etched crystals a burnished appearance results but this usually disappears in later chemical treatments.
With this first wash there will always be sand and dirt deep in the crevices between crystals. these can be loosened with a set of dental picks. They come in a variety of shapes and sizes. Often a friendly dentist will give away his old ones. If you are not friendly with your dentist (who wants to be friends with their dentist?) and you cannot find them at your hardware store you can purchase them mail order from Woodworkers Supply (1-800-645-9292) item no. 862-028, set of four utility picks for $8.95. These picks are steel and therefore harder. So be careful not to use a scratching stroke. Just loosen the dried, caked dirt in the crevices.
Ultrasonic Cleaner
Obviously with delicate crystals scratching is not the problem, they will simply break off from the force. With delicate specimens we need to use an ultrasonic cleaner. These are simple stainless steel basins with piezoelectric drivers attached to the bottom. They often have built in timers and heaters. When turned on they vibrate the solution at ultrahigh frequency causing cavitation, the formation and collapse of bubbles. This cavitation scrubs off dirt and soluble minerals very fast without damaging delicate crystals. I can hear the skeptics out there saying that some minerals can be damaged, like herkimer diamonds (after all, aren't we supposed to pack them in temperature shielding sand or sawdust). Well this may be true, but in my experience (and this article is nothing more than one persons methods learned through trial and error) I have only had one herkimer diamond damaged. (There was a large stress fracture in a 2" crystal that "popped" during cleaning.) But in terms of odds, I have cleaned thousands of herkimers and only that one broke.
The ultrasonic cleaner is the best way to clean zeolites from New Jersey. Especially delicate natrolite sprays or terminated pectolite. Unfortunately they are expensive. If you shop around for the best price you will pay around $150.00 for every quart of capacity. I have a three quart unit that is more than adequate. Unless you collect a lot of large specimens, then a 1-1/4 quart unit will suffice.
I highly recommend getting a built-in heater. it is well worth the extra expense. It will heat the solution to just below boiling and keep it at that temperature. That is perfect for cleaning with oxalic acid (see Part I). The heat accelerates the action of the acid, but prevents the acid from boiling.
Sand Blasting
Sand blasting sounds exotic but is more common than you would think. All of the pink tourmaline in purple lepidolite sold has been sandblasted to expose the harder tourmaline. The sand blasting removes the softer lepidolite very quickly and leaves a more natural appearance than chisels or scrapers. The new pink chalcedony from New Mexico being sold by Ray DeMark is all sandblasted. In its natural state it is rough and encrusted. A quick sandblast and only the harder quartz chalcedony remains. Amazonite from Colorado is also cleaned with sand blasting. These crystal often have a late growth without the blue-green amazonite color. The outer coating is blasted off with glass beads and then the surface is "polished" by sandblasting with a soft limestone powder.
A sand blasting unit is not expensive. The basic setup can be purchased for around $50.00. However the air compressor to drive the sand blaster is expensive. Unless you already have access to a 3.5 HP air compressor, then sandblasting is not for you. There are many different media that you can use in a sandblaster. Anything the consistency of table salt can be blown through the gun, wet or dry. Glass beads are readily available and are the hardness of quartz. But you can purchase many different hardnesses down to 3.5 on Moh's scale. The goal is to choose a media softer than the mineral you want to keep but harder than the mineral you want to remove. I have found it works great for removing schist matrix from almandine garnet and staurolite crystals. There has been much discussion regarding the effects of sandblasting minerals including an article in Rocks and Minerals. The article points out that chalk dust with a hardness (H) of 3 has been found to abrade periclase (H: 5.5). The article points out that the force that you drive the media can result in damage to the specimen and recommends testing on a sample until you get the right balance of air pressure and correct media hardness.
Air Scribe
This is a miniature reciprocating impact chisel commonly used by fossil preparers to expose fossils. ARO air scribe Model 8315 costs $289.00 and comes with a medium carbide tip. Additional tips are available in fine to coarse for $31.00 each. from Main Tool Supply, 55 Lafayette Ave., North White Plains, NY 914-949-0037 These tools reciprocate at 36,000 cpm and are very efficient at locally removing matrix. Fluorescent collectors find these are the best tools for removing calcite from willemite specimens because acid will etch willemite.
Water Gun
Similar to a sand blaster, the water gun is used in the dry cleaning industry as a stain remover (they blast cleaning agent right through the fabric). The Krebs 5000 cost $350.00 and is available from Aurora Mineral Corp. at 516-623-3800.
The action is a combination of sandblasting and ultrasonic. The gun creates a fine, high powered jet of water that will loosen most clays or dirt. It is very forceful though and not suitable for delicate minerals. The advantage is that you can put solutions other than water in the gun. In theory you could shoot oxalic acid through it. But since oxalic acid requires time to work the value is questionable. And remember the toxicity of oxalic acid, the last thing you should do is create a fine mist of oxalic acid that you could accidentally breathe.
A simpler and cheaper alternative to the water gun is to take your minerals to a do-it-yourself car wash. Lay out all of your minerals and for $1.75 in quarters you can blast away almost anything with the water gun can, plus you can get a hot wax at the same time.
In conclusion, you do not have spend lots of money to clean your minerals. In many cases the brass brush is all that you need. Remember also that these mechanical methods are often the first in a many step process. You may start with brass brush then use hydrochloric acid and finish with oxalic acid.
The "Waller" Solution
This method of mineral cleaning was first introduced to me by Roland Franke as a simple method of cleaning iron stain from minerals. Further research reveals different methods of using the basic solution.
As originally described by Roland the solution is made by dissolving in one liter of distilled water:
8.4g Sodium Bicarbonate
17.4 g Sodium Dithionite
5.9g Trisodium salt of Citric Acid (sodium citrate)
Once mixed, the minerals are immersed in the solution. The cleaning action can be accelerated by placing in an ultrasonic cleaner. This solution is not appropriate for indoor use because, once mixed, there is a strong odor of rotten eggs. Use only outdoors or in an area with proper exhaust venting. As usual read all precautions on the individual component packages.
The solution is good for only about 24 hours and should be discarded after that. Since a liter of solution may be more than you need, the Geological Museum of Copenhagen (Hansen, 1984) suggests a variation - you can prepare a stock buffer solution of one liter water, 28 g sodium bicarbonate and 59 g sodium citrate (citric acid). Then when ready place your specimens in a container, pour in buffer solution to cover the top, then carefully sprinkle on top 1 g sodium dithionite for every 30 ml of buffer solution. After five minutes another 1 g of sodium dithionite is added in the same way. They also recommend sealing tightly with a lid and keeping at room temperature to avoid the formation of sulfides and sulfur.
If you have heavy iron stain a specimen may require several treatments in succession as the solution becomes saturated and loses effectiveness. After your piece is clean then wash in distilled water for an equal amount of time that the specimen was in the solution. Then in running (or regularly changed) tap water.
Apparently the solution works by reducing Fe+3 to Fe+2 and then dissolving Fe+2 in the Citric Acid. The Sodium Bicarbonate balances the pH to be neutral. This last point means that theoretically you can clean any mineral in it without worrying about etching it. Practically though caution should be taken by testing on samples prior to immersing your best piece. In conclusion, I have stayed clear of the more hazardous hydrofluoric, sulfuric, nitric acids and treatments for specialized uses such as cleaning native copper. If you are looking for more information I highly recommend starting with John Sinkankas books Field Collecting for Gemstones and Minerals (originally published as Gemstones and Minerals: How and Where to Find Them and Gemstone and Mineral Data Book, both published by Geoscience Press.
 YueGongAnBei 44051102000467
 |
|